Elevated Visuals LLC
How to Prepare a Home for Professional Real Estate Photography
A camera-ready home photographs larger, brighter and more inviting. Use this practical guide to prepare the exterior, living spaces, kitchen, bedrooms and bathrooms before the photographer arrives.
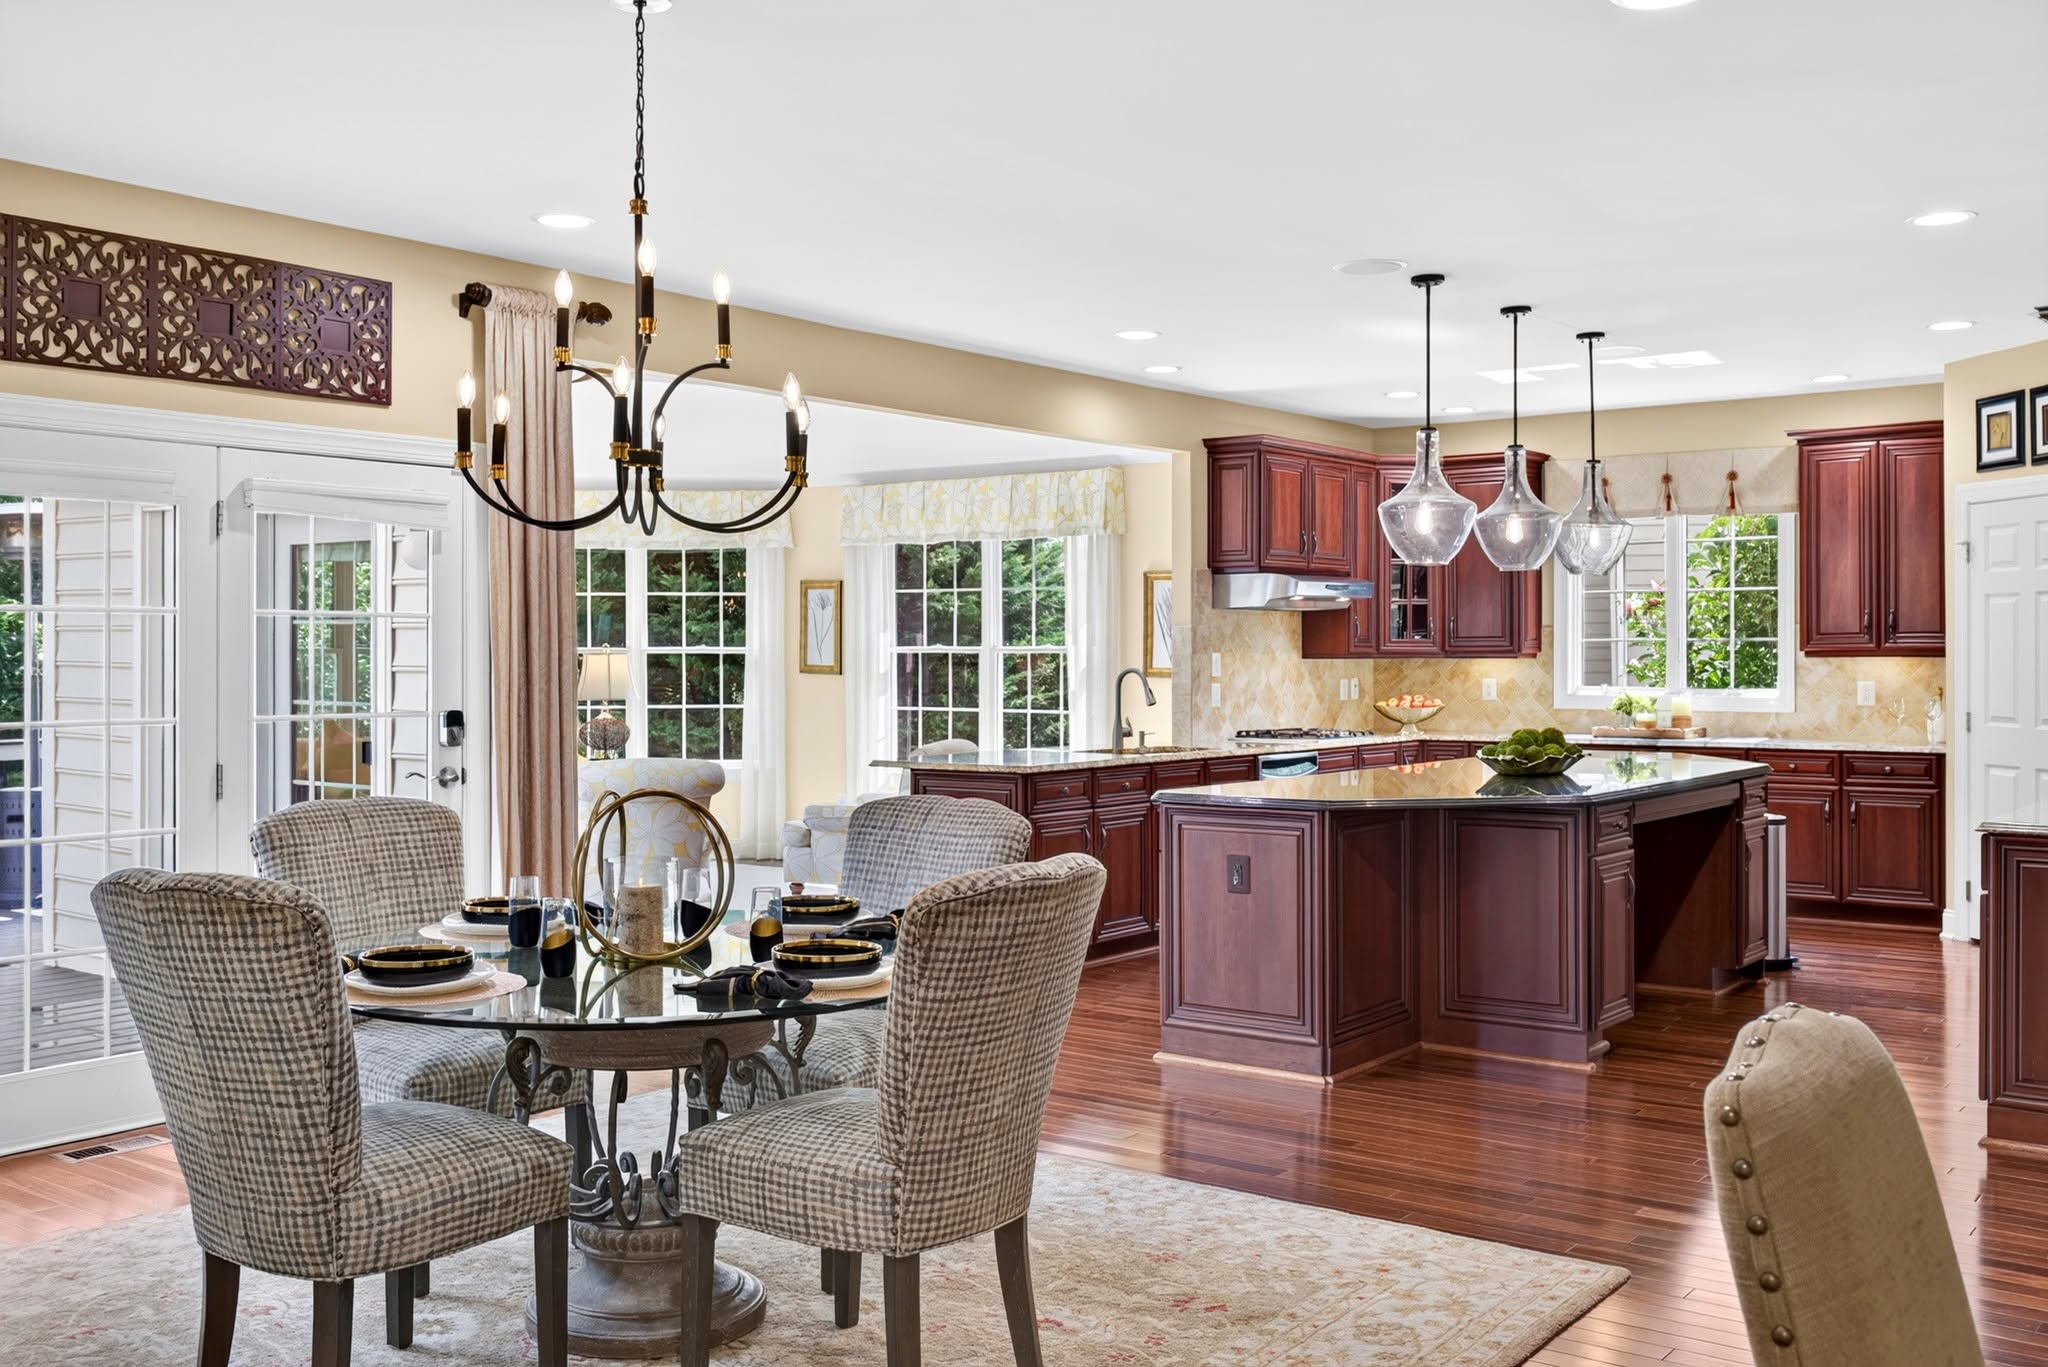
The best real estate photographs begin before the camera comes out of the bag. A clean, open and thoughtfully prepared home allows buyers to notice the light, layout and features of the property instead of the objects sitting on a counter.
You do not need to make the home look empty or impersonal. The goal is to remove visual distractions and give each room a clear purpose. Because wide-angle photography reveals more than we notice while walking through a space, small items can quickly add up to visual clutter.
Here is how to get the home ready.
Start with the exterior
The front exterior often becomes the first image buyers see online, so begin at the curb.
- Move vehicles out of the driveway and away from the front of the home.
- Store hoses, trash cans, bicycles, toys and garden tools.
- Sweep the driveway, walkways, porch, deck and patio.
- Mow the lawn, collect leaves and remove fallen branches.
- Arrange outdoor furniture and open clean patio umbrellas.
- Remove pool covers and tidy the area around pools or water features.
- Close and clean the windows.
- Turn on exterior lights.
If the property has acreage, water access, a detached structure or a view, tell the photographer before the appointment. That helps with planning ground and aerial coverage.
Clear the main living spaces
Begin with anything that draws attention away from the room itself. Remove excess items from floors, tables, shelves and other horizontal surfaces. Put away mail, magazines, remote controls, visible power cords and cleaning supplies. Hide trash cans and pet beds.
Personal photographs and highly specific religious or political items should also be stored. A few books, plants or neutral decorative pieces can remain when they help the room feel finished.
Straighten furniture and remove bulky pieces that make walkways feel narrow. Open blinds and shades, replace burned-out bulbs and turn on every working lamp and ceiling light. Turn off televisions, monitors and ceiling fans.
Make the kitchen feel spacious
Kitchen counters photograph best when they are almost clear. Put away small appliances, food, dish racks, soaps, sponges, towels and cleaning products. Remove magnets, calendars and papers from the refrigerator.
Clean the sink, counters, backsplash and appliance fronts. A simple bowl of fruit, plant or other small decorative item is enough to keep the room from feeling bare without hiding the available workspace.
Keep dining areas simple
Straighten the table and chairs, dust visible surfaces and choose one uncomplicated centerpiece. Full place settings are optional; clean lines and open space usually read better in listing photographs.
Reset every bedroom
Make each bed carefully and arrange the pillows. Put away clothing, shoes, chargers and items from nightstands and dressers. Check under the bed for anything visible from a low camera angle.
If a room has become overflow storage, either restore its intended purpose or consolidate the contents neatly outside the main sightlines. Buyers should be able to understand the room as soon as they see it.
Make bathrooms feel fresh
Clear the counters, shower and tub of toiletries. Remove toilet brushes, scales, wastebaskets, bath mats and cleaning products. Close the toilet lid, clean the mirrors and glass, and hang fresh towels neatly.
Bathrooms are small, reflective spaces, so every visible item has an outsized effect on the final image.
Plan for pets and people
The smoothest appointments happen in an empty home. Arrange for residents, children and pets to leave during the shoot when possible. Secure pets safely away from the property rather than moving them from room to room as the photographer works. Hide bowls, beds, litter boxes and toys.
If someone must remain, choose one out-of-the-way area and be ready to move when that space is photographed.
Take care of these details before the photographer arrives
Before the scheduled time:
- Open window treatments and turn on all interior and exterior lights.
- Turn off televisions, screens and ceiling fans.
- Confirm that every room, garage and exterior area is accessible.
- Leave keys, gate codes and lock-up instructions if the home will be vacant.
- Share any features that should be highlighted, along with property-line information for aerial overlays if ordered.
- Complete all cleaning and staging. The property will be photographed as it is found.
Allow enough time to finish before the appointment. Last-minute cleaning can delay the shoot, and photographers generally cannot move personal belongings, stage rooms or wait while each area is prepared.
A little preparation has a large effect
Good preparation helps rooms look open, keeps the visual style consistent and lets the photographer spend the appointment creating stronger images. It also helps agents bring the listing to market on schedule.
For an easier handoff between agent and seller, use the interactive Elevated Visuals Photo-Ready Checklist. It includes 43 room-by-room tasks, saves progress on the device and can be printed or shared before the shoot.